When it comes to home renovation, installing mosaic tiles with mesh backing on a wall can dramatically transform the aesthetics of a room. Despite seeming intricate, the process is quite manageable with the right tools and techniques.
This guide will walk you through each step of installing mosaic tiles with mesh backing on your wall, enabling you to rejuvenate your space with a splash of creativity and personal style.
Preparation
Evaluate the Wall Condition
Before initiating the installation process, it’s crucial to assess the condition of your wall. Ensure it’s smooth, clean, and devoid of any moisture or dirt. Any imperfections or irregularities may interfere with the tile adhesive and the ensuing installation.
If necessary, perform repair work to create a level, solid base for your new mosaic tiles.
Gather All Required Materials and Tools
Once the wall is ready, collect all the equipment necessary for the tile installation. This includes mosaic tiles with mesh backing, tile adhesive, grout, a notched trowel, a tile cutter, a rubber grout float, a sponge, and a bucket.
Having all your tools within reach will streamline the installation process, keeping it efficient and hassle-free.
Ensure Safety Measures
Safety should always be a top priority when embarking on a DIY project. Wear protective gear such as gloves, safety glasses, and a dust mask to protect yourself from dust and sharp tile edges.
It’s also wise to keep your work area well-lit and ventilated to maintain a safe and comfortable working environment.
Preparing the Tiles
Understand the Design Layout
Before installing the mosaic tiles, it’s crucial to have a clear understanding of the design layout you intend to follow. This involves arranging the tiles on a flat surface in the pattern you wish to replicate on your wall.
Pay close attention to the positioning of different colors, textures, and shapes. Remember, mosaic tiles with mesh backing allow flexibility in design while maintaining uniform spacing between the tiles.
Once you are satisfied with your design, take a picture for reference during installation. This step ensures an organized approach and aids in achieving a visually pleasing result.
Cutting Mosaic Tiles
Measure and Mark the Tiles
Before cutting your mosaic tiles, take accurate measurements of the space where the tiles will be placed. Use a straight edge or ruler and a marker to draw lines on the tile where cuts need to be made.
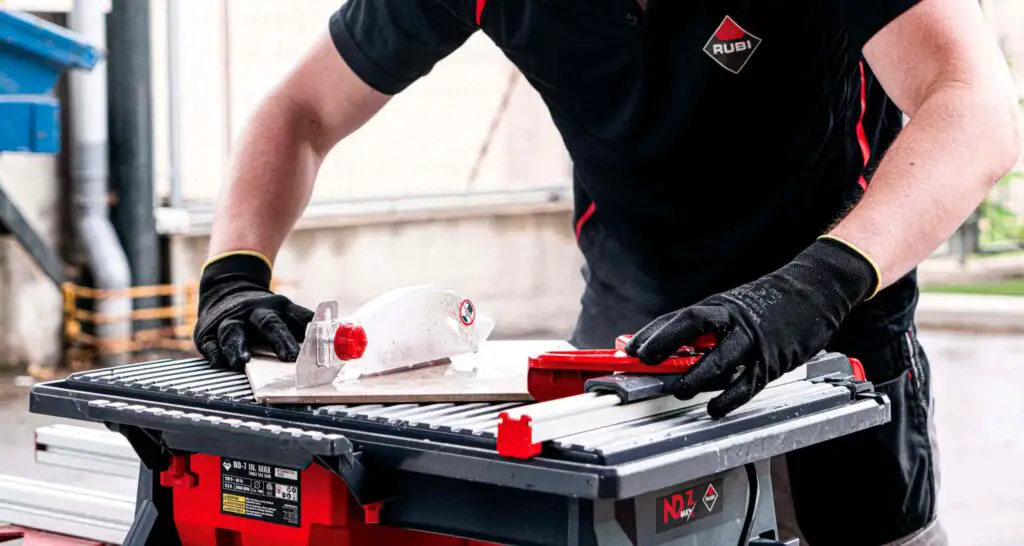
Use a Tile Cutter
When cutting mosaic tiles, especially those with mesh backing, a tile cutter is a handy tool. It allows clean, precise cuts with minimal risk of damaging the tiles. Align the marked lines with the cutting guide on your tile cutter. Apply even pressure and push the cutter across the tile.
Check the Fit
After cutting, always check the fit of your tile piece in its designated spot on the wall before applying adhesive. This can help prevent any misfits after the adhesive has been applied. Remember, precision is key when installing mosaic tiles to achieve a professional-looking finish.
Safety First
Safety is paramount when cutting tiles. Always wear protective gloves to prevent accidental cuts and safety glasses to protect your eyes from tile fragments.
Applying the Adhesive
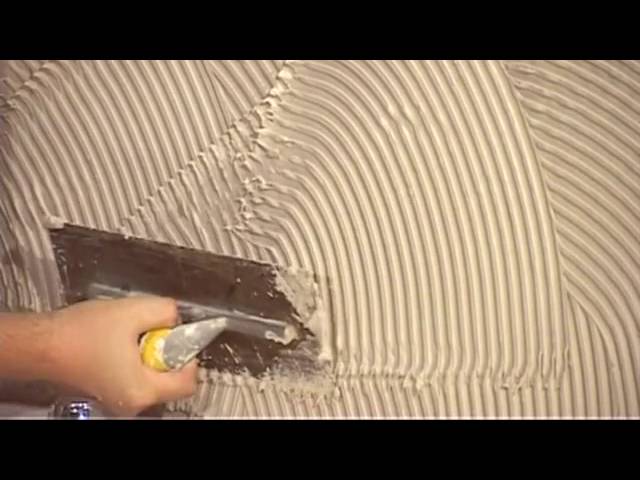
Apply the Tile Adhesive to the Wall
To install the mosaic tiles, the first step is to apply a layer of tile adhesive to the wall. Use a notched trowel for this task; the notches will create ridges in the adhesive, which aids in securing the tiles firmly.
Hold the trowel at a 45-degree angle and spread an even layer of adhesive over a small, manageable area of the wall.
Be careful not to cover too large an area at once, as the adhesive may dry before you have a chance to place the tiles. Once the adhesive is applied, you’re ready to begin setting your mosaic tiles into place.
Ensure Adhesive is Spread Evenly
For a strong bond and a smooth finish, the adhesive must be spread evenly over the area where you plan to install the mosaic tiles. Uneven application can lead to tiles that sit at different depths, affecting the overall look and feel of your mosaic.
After spreading the adhesive with a notched trowel, take a moment to check your work. The adhesive should cover the entire area, with no bare spots or excessively thick areas.
The ridges left by the notched trowel should be uniform in height; this will make sure your tiles lay flat and adhere securely to the wall. If necessary, go back over any uneven areas with the trowel until you’re satisfied with the consistency.
Take your time with this step it’s the foundation for your mosaic, and a little attention to detail here can save you from problems later on.
Installing the Mosaic Tiles
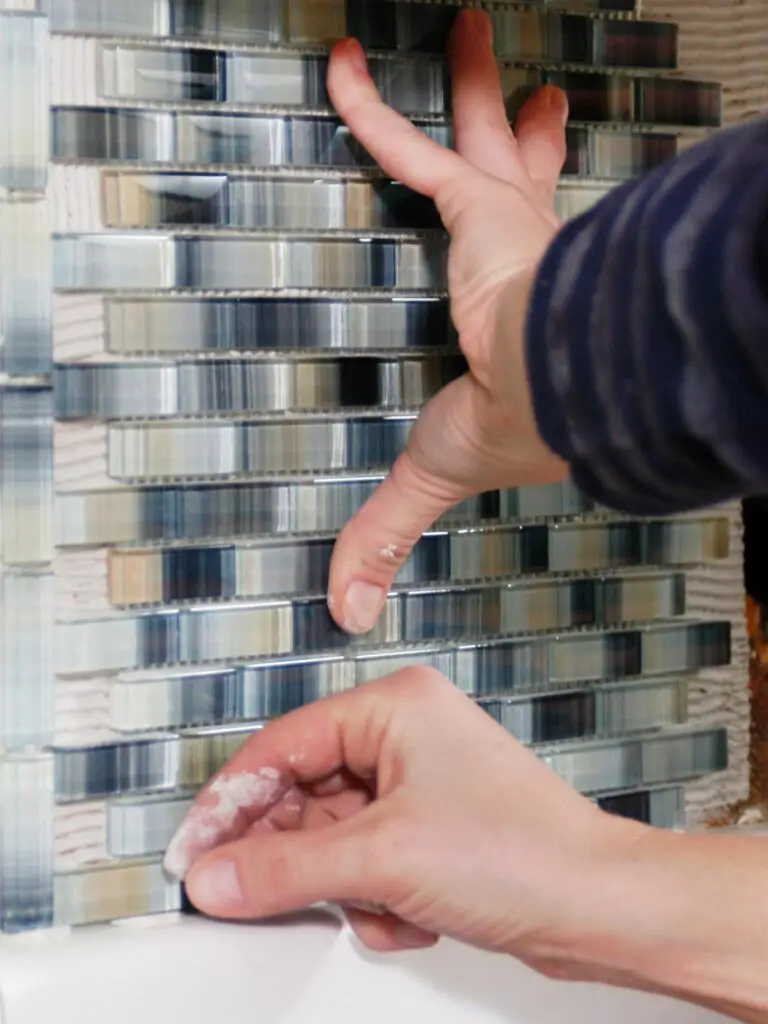
Align the Mosaic Sheet to the Wall
After preparing the surface with adhesive, it’s time to align the mosaic sheet to the wall. Begin at the bottom corner of the wall and carefully align your first sheet of mosaic tile onto the adhesive.
The edges of the sheet should be parallel to the edges of the wall. Press the mosaic sheet into the adhesive, ensuring the mesh backing is fully embedded in the adhesive. Take care not to press too hard; you want to avoid having adhesive seep through the gaps and onto the front of the tiles.
Once the sheet is in place, give it a gentle wiggle to help secure it to the wall. Now, use a grout float to gently press the tiles into the adhesive, starting from the center of the sheet and working your way outward.
The float ensures an even pressure across the entire mosaic sheet, promoting a strong bond between the tile and wall.
This process should be repeated for each mosaic sheet, ensuring each one aligns with the last, creating a seamless flow across your mosaic wall.
Pressing the Tiles into the Adhesive
Once the mosaic sheet is aligned, the next step is to press the tiles into the adhesive. Start at the center of the mosaic sheet and, using a grout float, apply even pressure while moving outward.
This action is important as it ensures an even and secure bond between the tiles and the wall. The float’s flat, rigid edge provides an ideal surface to apply pressure, distributing it evenly across the tiles.
It’s crucial to maintain a gentle touch during this process. Pressing too hard could force the adhesive up between the tiles, which complicates grouting later. Conversely, not applying enough pressure may result in a weak bond, causing the tiles to potentially fall off later.
Should adhesive seep onto the front of the tiles, quickly wipe it off with a damp sponge to prevent it from hardening and affecting the appearance of the mosaic.
Remember to clean the grout float after each use to avoid any dried adhesive from interfering with the even application of pressure.
Repeat this process for each mosaic sheet, ensuring that the pressure is consistently applied across all the tiles. This consistent pressure will ensure a smooth, even surface, and a secure bond for your mosaic wall.
Using the Grout Float to Ensure Firm Setting
After all mosaic sheets have been installed, it is time to ensure that the tiles are firmly set. To do this, you will need to use a grout float once again.
Starting from the center of each sheet, glide the float across the tiles with a sweeping motion, applying slight pressure evenly. This action helps to embed the tiles deeper into the adhesive, removing any potential air pockets and ensuring a strong hold.
Do not press too hard to avoid dislodging the tiles or pushing them deeper than intended. The objective is to ensure that each tile across all sheets is at the same level, creating a flat, uniform surface.
If you notice any tile sitting higher or lower than the others, adjust its setting by applying more pressure or adding a bit more adhesive as necessary.
Once you’ve ensured that all tiles are firmly set, give the adhesive ample time to dry before moving on to the next step. The manufacturer’s instructions on your adhesive product will guide on drying time.
Related Topics:
Final Touches
Applying the Grout
Finally, once the adhesive has dried, it’s time to apply grout to the spaces between the tiles. Begin this process by preparing your grout as per the manufacturer’s instructions.
Usually, this involves mixing it with water until it reaches a creamy consistency. Then, take your grout float and apply the grout diagonally across the tiles, pushing it into the joints. Ensure all spaces are filled with grout for a uniform look.
Cleaning off Excess Grout and Adhesive Residue
Once the grout is applied, allow it to set for about 10-15 minutes. Then, using a damp sponge, gently wipe the mosaic tiles to remove the excess grout and any remaining adhesive residue.
Be careful not to apply too much pressure as it can dislodge the grout from the joints. Rinse the sponge frequently in clean water and change the water if it gets too dirty.
Sealing the Tiles, If Required
If your mosaic tiles are made from natural stone, sealing them will be necessary to prevent staining and maintain their appearance.
Once the grout has completely dried (refer to the manufacturer’s instructions for the duration), apply a sealant using a small paintbrush or a sponge. Ensure every tile surface and grout line is coated with the sealant, but avoid pooling. Allow the sealant to dry.
Allowing the Tiles to Dry
Finally, after all these steps have been completed, you must let the tiles dry completely. This may take anywhere between 24 to 48 hours, depending on the type of adhesive and grout you’ve used.
Resist the temptation to touch or use the tiled area during this time, as any movement can interfere with the setting process and result in uneven tiles. After the drying time has passed, your mosaic tile installation is complete!
Conclusion
Installing mosaic tiles with mesh backing on a wall is a rewarding DIY project that can enhance the aesthetic appeal of your space.
From assessing the wall condition, gathering necessary tools and materials, understanding the design layout, cutting the tiles, applying adhesive, and setting the tiles, to grouting and cleaning, each step is instrumental in achieving a successful and professional-looking finish.
Don’t forget the final steps of sealing (if required) and allowing the tiles to dry thoroughly. With patience and careful execution, your mosaic tile installation project can yield beautiful results that add a unique touch to your home decor.
This guide should serve as a comprehensive roadmap for installing mosaic tiles with mesh backing on your wall.
FAQs
What are some common mistakes to avoid when installing mosaic tiles with mesh backing on a wall?
Some common mistakes to avoid include: not properly preparing the wall surface (it should be clean and flat), not using the correct adhesive (thin-set mortar is typically recommended), not allowing enough time for the adhesive and grout to dry, and not sealing the tiles and grout if needed. It’s also crucial to avoid stepping on or disturbing the tiles before they have had a chance to set.
Can mosaic tiles with mesh backing be installed in areas exposed to water like bathrooms or kitchen backsplashes?
Yes, mosaic tiles with mesh backing can be installed in areas that are frequently exposed to water. However, it’s essential to use a waterproof adhesive and grout. Also, after installation, ensure the tiles and grout lines are sealed properly to prevent water penetration.
What type of maintenance is required for mosaic tiles?
Mosaic tiles are relatively low-maintenance. Regular cleaning with a non-abrasive, mild detergent should keep them looking new. Avoid using harsh chemicals or acidic cleaners, as these can damage the grout and tile surface. Sealing may need to be re-applied periodically depending on usage and the type of sealant used.
1 thought on “Installing Mosaic Tiles With Mesh Backing On A Wall”