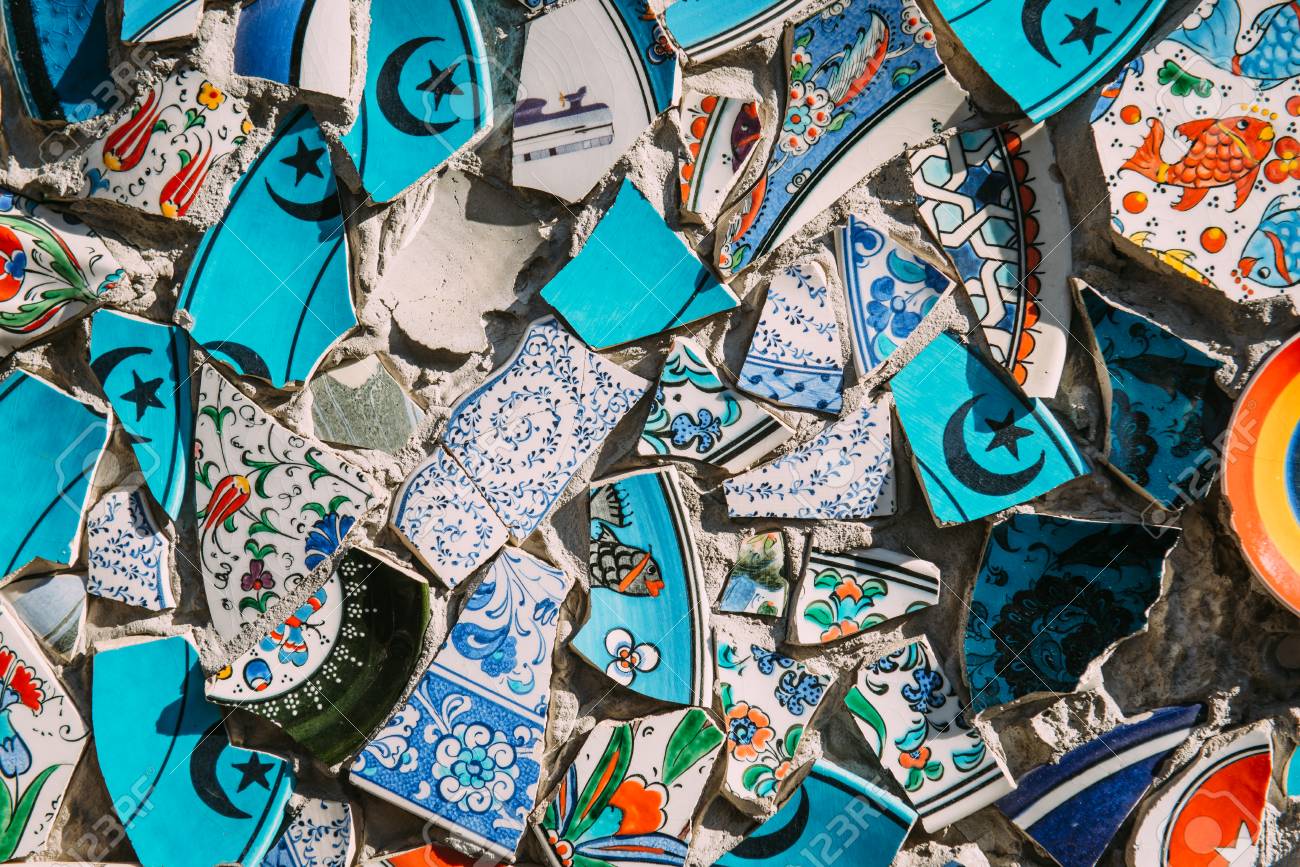
Creating mosaic tiles from plates is an engaging and eco-friendly art project that transforms discarded ceramics into beautiful, intricate designs. This simple yet rewarding process breathes new life into unwanted dishes, allowing you to repurpose them into vibrant, unique mosaic tiles.
Whether you’re planning to revamp your kitchen backsplash or create a stunning piece of wall art, learning how to make mosaic tiles from plates provides an opportunity to unleash your creativity while recycling and reusing materials.
Materials Needed
- Various plates with different designs
- Safety goggles and gloves
- Hammer
- Tile adhesive and grout
- A flat surface to create your mosaic on
Safety Precautions
Wearing Safety Goggles and Gloves
Your safety is paramount while undertaking this project. Always wear safety goggles and gloves when breaking the plates to protect your eyes and hands from sharp shards. The gloves will also prevent any potential injury when handling the broken pieces.
Working in a Well-Ventilated Area
Working in a well-ventilated area is essential when making mosaic tiles from plates. This precaution ensures that any dust from the broken plates is adequately dispersed, reducing the risk of inhalation.
It also provides a safe environment when applying the tile adhesive and grout, as these materials can sometimes emit fumes that should not be inhaled in confined spaces. Always remember, that your health and safety come first in any DIY project.
Breaking the Plates
Wrapping the Plates in a Cloth
Before you start breaking the plates, it’s crucial to ensure that the fragments don’t scatter around. To prevent this, wrap each plate in a thick, sturdy cloth.
A well-used canvas drop cloth, an old towel, or a piece of denim from an old pair of jeans works well for this task. Make sure the entire plate is covered by the cloth to contain all the fragments once the plate is shattered.
This method makes handling the broken pieces safer and helps maintain a clean workspace.
Gently Breaking Them with a Hammer
After securely wrapping the plate in a cloth, it’s now time to break it into pieces. Place the wrapped plate on a hard, flat surface, ensuring there’s nothing around that could be damaged by any stray fragments.
With safety goggles and gloves on, take a hammer and gently tap on the wrapped plate. You don’t need to use too much force, a few gentle taps should be enough to break it into varied sizes perfect for a mosaic.
Unwrap the fabric carefully to reveal the broken pieces. Remember, the goal is to produce a variety of tile sizes, so don’t worry if the pieces aren’t evenly sized or shaped. Each unique piece adds character to your mosaic, making it truly one-of-a-kind.
Preparing the Surface
Cleaning and Drying the Surface
Before applying the tile adhesive, it’s essential to properly clean and dry the surface where the mosaic will be created. Use a damp cloth to wipe off any dust or residue.
If the surface has any greasy spots or stubborn dirt, consider using a mild detergent or soap solution. Once the surface is clean, let it dry completely. A clean, dry surface is essential for the tile adhesive to bond effectively, ensuring the longevity of your mosaic work.
Applying a Layer of Tile Adhesive
Once the surface is completely dry, it’s time to apply the tile adhesive. Use a notched trowel to spread the adhesive evenly over the surface. Ensure that the entire area is covered with a thin, uniform layer of adhesive.
Try to work quickly, as tile adhesive can dry fast. Once the adhesive is applied, you’re ready to start setting your mosaic tiles.
Creating the Mosaic
Arranging the Broken Pieces into the Desired Design
Visualizing and arranging your design is the next step in creating your mosaic masterpiece. Begin by laying out the broken plate pieces on the adhesive-covered surface, starting from the center and working your way outward.
This method allows for better control over the design and ensures that the central focus is established. Try not to press the pieces into the adhesive just yet, as you might want to rearrange them as your design evolves.
Think about the balance of color and texture, ensuring that the brighter or more textured pieces are distributed evenly across the mosaic. Remember, mosaics are all about creativity and individuality.
If a piece doesn’t fit perfectly, that’s okay – it adds to the charm and unique nature of the mosaic.
Pressing the Pieces into the Adhesive
Once you’re satisfied with your layout, it’s time to firmly press the broken pieces into the adhesive. Start from the center of the design and work your way outwards, following the same pattern you used while arranging the pieces.
This ensures a balanced application of pressure and secures the pieces evenly.
Using your fingers, apply gentle, consistent pressure on each piece to embed it into the adhesive. Be careful not to press too hard, as this could cause the pieces to sink too far into the adhesive or even break.
The objective is to make sure every piece is sufficiently embedded to hold it in place and withstand the grout application that follows.
Once all the pieces are secured, let the adhesive dry according to the manufacturer’s recommendations.
It’s essential to not disturb the pieces during this drying period, as movement can result in loose tiles, altering your design, or weakening your mosaic’s overall structure.
Grouting the Mosaic

Applying Grout Between the Pieces
Once the adhesive has completely dried, it’s time to apply the grout. Grout is the material that fills the spaces between your mosaic pieces, providing additional strength and aesthetic appeal.
Begin by preparing the grout according to the manufacturer’s instructions. The consistency should be similar to a thick paste. Using a grout float or an old credit card, spread the grout over the mosaic, making sure it enters all the spaces between the pieces.
It’s okay if the grout covers the pieces; we will clean this off later. Work diagonally across your piece to ensure you’re pushing the grout into each crevice. Once all the gaps are filled with grout, allow it to set for about 15-30 minutes.
Removing Excess Grout and Drying
After the grout has set, it’s time to remove the excess. Using a damp sponge, gently wipe across the surface of your mosaic. This requires multiple passes as the sponge will pick up the grout from the tile surfaces, but leave it in the cracks where it’s needed.
Remember to rinse your sponge frequently to keep it clean. Continue this process until all excess grout is removed and the tiles are clean. Once you’re done, let the grout dry completely – typically, this takes about 24 hours but check the manufacturer’s recommendations.
Ensure the mosaic is in a dry, warm place with good ventilation to speed up the drying process. Once the grout is fully dry, your unique, hand-made mosaic tile art is ready to be displayed.
Related Topics:
Finishing Touches
Cleaning the Surface of the Mosaic
After the grout has fully dried, it’s essential to do a final cleaning to ensure the surface of your mosaic shines. Use a soft, clean cloth to gently buff the surface, removing any remaining grout haze.
You might also consider using a specialized stone and tile cleaner for stubborn grout haze, but always test any cleaning products on a small, inconspicuous area first to ensure it won’t damage your mosaic.
Sealing the Grout for Longevity
The final step in your mosaic project is sealing the grout. This is vital for longevity, especially if your mosaic will be exposed to moisture or heavy use. It prevents stains and damage, keeping your artwork vibrant and beautiful for longer.
Use a high-quality grout sealer, apply it according to the manufacturer’s instructions, and allow it to dry thoroughly. Remember, the sealer should be applied only to the grout lines and not the tiles.
Once the sealer is dry, your mosaic project is fully complete and ready to be admired for years to come.
Conclusion
Creating mosaic tiles from plates is an art project that allows you to explore your creativity while also being environmentally friendly. The process is not only therapeutic but also results in beautiful pieces of art that can be used to decorate your personal spaces or given as unique gifts.
From the selection of designs and breaking the plates, to arranging the pieces and grouting, every step of the project is a chance to put your personal touch on the final product. The satisfaction of creating something beautiful out of discarded items is immense.
This guide on how to make mosaic tiles from plates has provided you with a comprehensive step-by-step process to create your mosaic art.
Now that you are equipped with the knowledge, it’s time to put on your creative hat and start your mosaic project. Enjoy the process and happy crafting!
FAQs
What type of plates are best for creating mosaic tiles?
When selecting plates to create mosaic tiles, it’s recommended to use ceramic or porcelain plates. They are sturdy, break into pieces easily, and offer a wide range of colors and patterns to work with.
Can I use other types of adhesive apart from tile adhesive when laying my mosaic tiles?
While there are various types of adhesives you can use, it’s best to use tile adhesive or thin-set mortar. These adhesives are specifically designed for tile work and provide the strongest bond, ensuring your mosaic will last for years.
How should I clean my mosaic tile art piece?
You can clean your finished mosaic art piece with a damp cloth. Avoid using harsh chemicals or abrasive cleaners as they could damage the sealer and dislodge the tiles. It’s also recommended to regularly dust your mosaic piece to keep it looking its best.
1 thought on “How To Make Mosaic Tiles From Plates: DIY”