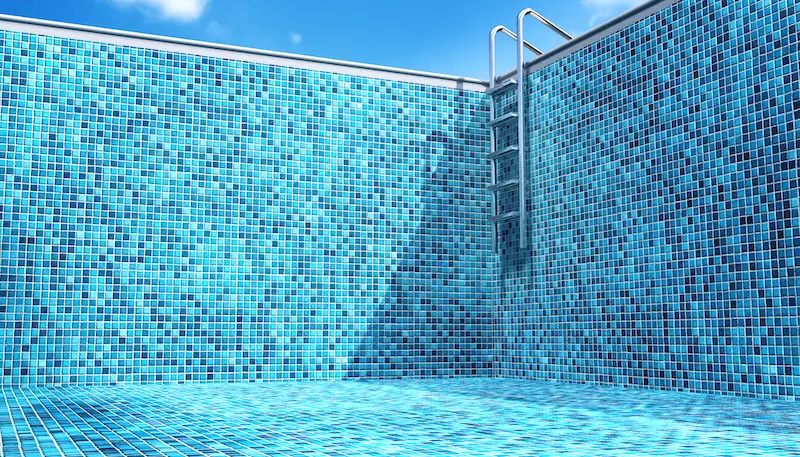
Tiling a swimming pool with mosaic tiles is not merely a design choice, but an art that brings life and luxury to your swimming area. Mosaic tiles, with their vibrant hues and varying shapes, can transform a pool into a stunning aquatic masterpiece.
By tiling a swimming pool in mosaic tiles, you can create a captivating underwater landscape that enhances the entire ambiance of your outdoor space. This guide aims to provide you with comprehensive know-how on this remarkable technique.
Mosaic tiles offer numerous advantages. They are extremely durable, resistant to chemicals, and stand up well to constant exposure to water, making them ideal for swimming pool applications.
With their small size, mosaic tiles easily conform to gradual slopes and curved surfaces, providing a smooth finish even in complex pool shapes.
Their vast variety of colors and designs opens up endless possibilities for unique and personalized pool aesthetics. Additionally, the reflective nature of these tiles can enhance the luminosity and vibrancy of the pool water, adding to the overall visual appeal.
Required Tools and Materials
To tile a swimming pool with mosaic tiles, certain tools and materials are necessary. Here is a comprehensive list:
- Mosaic Tiles.
- Tile Adhesive – specifically designed for underwater applications.
- Grout – waterproof and suitable for pool tiling.
- Notched Trowel – for evenly applying tile adhesive.
- Grout Float – to apply and spread grout.
- Tile Spacers – for maintaining a uniform gap between tiles.
- Sponges and Buckets – for cleaning tiles after grouting.
- Protective Gloves and Safety Goggles – for personal protection during the tiling process.
- Tile Cutter or Nippers – for cutting and shaping tiles as needed.
- Rubber Mallet – for gently setting the tiles into place.
- Spirit Level – to ensure tiles are being laid evenly.
- Tape Measure and Pencil – for accurate measurements and marking.
Suitable Mosaic Tiles for Swimming Pools
When choosing mosaic tiles for swimming pool applications, consider factors such as material, color, finish, and size. Glass mosaic tiles are a popular choice due to their durability, vast color options, and shiny appearance which creates a stunning visual effect in the water.
Ceramic mosaic tiles, known for their high resistance to chemical and UV damage, also serve well in a pool environment. The color you select can greatly influence the pool’s aesthetics and the perceived color of the water.
Blues and greens typically create a traditional pool look, while brighter or darker colors can give a more unique, dramatic effect.
A gloss finish amplifies the reflectivity of light, enhancing the brilliance of pool water, whereas a matt finish provides a more subdued look.
Smaller mosaic tiles are preferred for pool bottoms due to their better adaptability to slopes and curves. Remember to opt for slip-resistant tiles for areas where safety is a concern, such as steps and pool edges.
Preparing the Pool Surface
Cleaning and preparing the pool surface
Before tiling, it’s crucial to thoroughly clean and prepare the pool surface to ensure a smooth and efficient application process.
Start by draining the pool completely. Once it’s emptied, use a pressure washer to remove any dirt, algae, or loose particles. This step is essential as any debris left on the surface can inhibit the adhesive from properly bonding with the tiles.
After the initial washing, closely examine the surface for any cracks or damage. Should you find any, they must be repaired using a suitable waterproof filler or sealant. Allow the filler to dry completely before proceeding.
Next, you’ll need to acid-wash the surface. To do this, make a solution of one part muriatic acid to sixteen parts water. Always remember to add the acid to water, not the other way around.
Also, ensure to wear protective goggles and gloves during this process for safety. Apply the solution evenly across the pool surface and leave it for about 30 minutes. Then, rinse off the acid thoroughly using the pressure washer.
After acid washing, the surface should feel like medium grit sandpaper. If it doesn’t, you may need to repeat the process. Once the desired texture is achieved, let the pool surface dry completely.
Now the pool is properly prepped and ready for the next phase: applying the tile adhesive and beginning the tiling process.
Applying Primer If Necessary
Should your pool surface be too smooth or if you’re dealing with a particularly porous surface, the application of a primer might be necessary.
A primer can help create a more suitable surface for the tile adhesive to bond with. Apply a coat of primer evenly across the surface using a roller or brush, ensuring that you cover all areas where tiles will be placed.
Allow the primer to dry completely before moving on to the next step. Always follow the manufacturer’s instructions for best results.
Planning the Mosaic Design
Choosing Your Design
When it comes to selecting a design for your mosaic tile pool, the possibilities are endless. You could opt for a simple, uniform look with one color, or perhaps a patterned design utilizing different shapes and colors of tiles.
Consider finding inspiration in nature, art, or geometric patterns. The key is to choose a design that complements the overall aesthetic of your outdoor space and resonates with your style.
Planning Tile Placement and Directions
Successful mosaic tiling is as much about precise planning as it is about creativity. Before you begin tiling, it’s critical to plan your tile placement and directions.
Start with a sketch of your pool on graph paper, marking out where each tile will go according to your chosen design. This planning stage is crucial for ensuring a symmetric and harmonious pattern, particularly if your design is intricate or involves multiple colors.
When planning tile direction, consider the natural flow of the pool’s shape.
Tiles should ideally follow the pool’s contours to create a cohesive look. For example, for a circular pool, you might choose to lay tiles in concentric circles. For a rectangular pool, a grid pattern might be more appropriate.
Also, think about how light and water will interact with your tiles. Light reflection can emphasize certain directions and patterns, enhancing the overall aesthetic appeal of the pool.
Similarly, the movement of water can create dynamic visual effects with your tiles.
Applying the Mosaic Tiles
Mixing the Adhesive
The first step in the tile application process is to properly mix the tile adhesive. This is a crucial part of tiling a swimming pool with mosaic tiles. Start by emptying the dry adhesive mix into a clean bucket.
Gradually add water as you stir, aiming for a consistency similar to a thick pancake batter. Make sure to mix thoroughly to avoid any lumps.
Let the mixture sit for about 10-15 minutes to allow for “slake time” This helps the chemicals in the mixture fully activate.
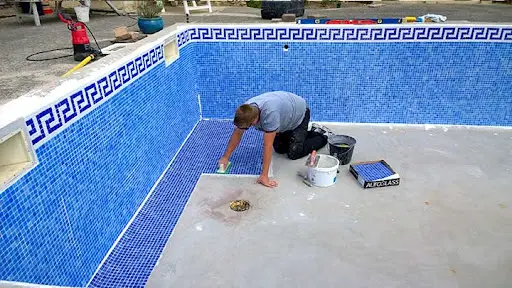
Applying the Adhesive and Setting the Tiles
Once your adhesive is ready, you can begin applying it to the area where you plan to place the tiles. Using a notched trowel, spread the adhesive evenly onto the pool surface, working in small sections to keep the adhesive from drying out.
Then, press your mosaic tiles into the adhesive. Remember to follow the tile placement and direction plans you made earlier.
This is pivotal in achieving a visually pleasing pattern when tiling a swimming pool with mosaic tiles.
Techniques for Applying Mosaic Tiles Evenly
Achieving an even application of mosaic tiles is essential for a professional finish. A helpful technique is to use tile spacers to ensure consistent spacing between each tile. Another tip is to regularly stand back and assess your work from a distance.
This allows you to spot and correct any inconsistencies in tile placement or direction early on.
Remember, patience and precision are key when tiling a swimming pool with mosaic tiles. The process may be time-consuming, but the result of a beautiful, custom-designed pool will be worth it.
Grouting the Mosaic Tiles
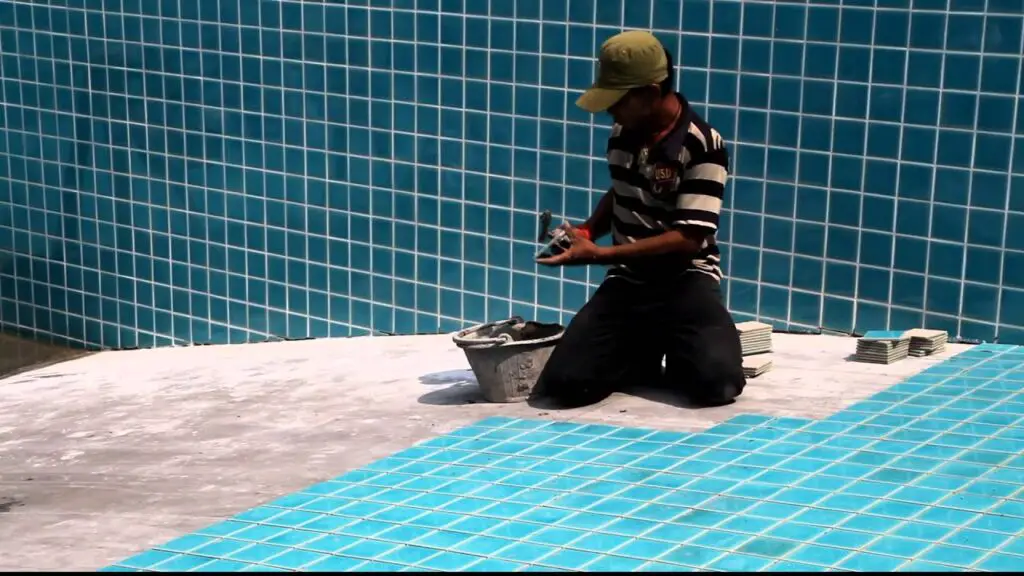
Image: blezztile.com
Choosing the Right Grout for Swimming Pools
When tiling a swimming pool with mosaic tiles, your choice of grout is just as important as your choice of tiles. Grout plays a crucial role in ensuring the durability and water resistance of the tiled area.
For swimming pools, epoxy grout is commonly recommended due to its superior stain resistance and impermeability to water.
It’s available in a variety of colors, allowing you to complement or contrast the color of your mosaic tiles. Remember to also consider grout color stability, as the grout should maintain its color despite exposure to pool chemicals and sunlight.
Applying the Grout
After selecting the right grout, the next step is its application. First, make sure all tile adhesive is dry and that spaces between tiles are clear of any dirt or debris.
Mix the grout according to the manufacturer’s instructions until you achieve a smooth, lump-free consistency. Using a grout float, apply the mixture to the tiled surface, pressing it firmly into the spaces between the tiles.
Ensure that all gaps are filled with grout. Work in small sections, and wipe off any excess grout from the tile surfaces with a damp sponge before it dries.
Cleaning Excess Grout
Cleaning excess grout is crucial for a clean and professional finish when tiling a swimming pool with mosaic tiles. Once the grout has dried partially (a state known as ‘set’), you can begin cleaning.
Use a damp, not wet, sponge to carefully wipe across the tiles diagonally to avoid digging grout out of the joints. Rinse the sponge frequently and change the water often to ensure a clean finish.
Be careful not to overdo this step as excessive cleaning can lead to grout discoloration or cause it to weaken. Once the grout has fully dried, polish the tiles with a soft, dry cloth to remove any leftover grout haze.
Related Topics:
Sealing and Finishing
Applying Sealant
The final step in the process of tiling a swimming pool with mosaic tiles involves applying a sealant. The sealant serves as a barrier, protecting the grout from the harsh pool chemicals and preventing discoloration and deterioration over time.
It’s advisable to apply the sealant after the grout has completely dried. Using a small brush, carefully apply the sealant over the grout lines, ensuring all areas are covered uniformly.
Allow the sealant to dry thoroughly as per the manufacturer’s guidelines before proceeding to the final cleaning and finishing step.
Final Cleaning and Finishing Steps
The last part of this project is the final cleaning and finishing of the tiled areas. Begin by wiping the entire surface with a damp cloth to remove any remaining dust or debris. For stubborn grout haze, consider using a grout haze remover.
Follow the product’s instructions carefully to avoid damaging your beautiful mosaic. Once cleaned, inspect the tiled area for any missing grout or inconsistencies in the sealant application and make any necessary touch-ups.
After completing these steps, your swimming pool will be ready to be filled with water. The result should be a sparkling, high-quality finish that complements your outdoor space beautifully.
Aftercare and Maintenance
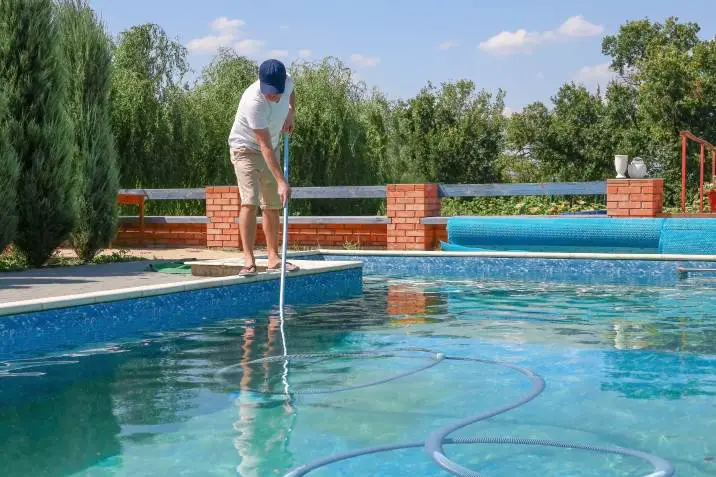
Regular Cleaning Methods
Regular cleaning is essential to maintain the shine and vibrancy of your mosaic-tiled swimming pool. Invest in a good quality pool brush and vacuum to get rid of any dirt or algae buildup over time.
For the tiles, use a mild detergent or specially designed pool tile cleaner to gently clean the surface without damaging the tiles or grout. Rinse thoroughly afterward to remove any soap residue.
For persistent stains, a non-abrasive cleaning pad can be used.
Maintenance Tips
Regular maintenance can significantly prolong the life of your mosaic-tiled swimming pool. Keep the pool chemicals balanced to prevent grout discoloration and tile erosion.
Immediately repair any loose or damaged tiles to prevent water from seeping under and causing further damage. Additionally, reapply sealant regularly, as recommended by the manufacturer, to protect the grout and tiles from harsh pool chemicals.
Lastly, consider hiring a professional pool cleaning service for an annual deep clean to keep your pool looking its best.
Conclusion
So, tiling a swimming pool with mosaic tiles is a task that requires thoroughness and dedication. However, with the right preparation, materials, and regular maintenance, you will create a stunning and long-lasting addition to your outdoor space.
The process may seem daunting, but the result of a shimmering, mosaic-tiled swimming pool is well worth the effort. Remember, every step from preparation, installation, and cleaning, to aftercare, plays a vital role in achieving the perfect finish.
Your diligence and hard work will pay off when you see the vibrancy and elegance of your newly tiled pool. Keep going, and soon you’ll be enjoying the beauty and luxury of your mosaic-tiled swimming pool.
FAQs
Can mosaic tiles be used in saltwater pools?
Yes, mosaic tiles can be used in saltwater pools. However, it’s essential to ensure the tiles you select are rated for saltwater use. Not all tiles handle saltwater conditions well, and improper selection may lead to premature tile damage.
How often should I reapply sealant to my mosaic-tiled swimming pool?
The frequency of reapplying the sealant depends on the type of sealant, the condition of the pool, and the frequency of pool use. Generally, it’s advised to reapply the sealant every 2-3 years, but always check the manufacturer’s instructions for the best results.
1 thought on “Tiling A Swimming Pool In Mosaic Tiles: How To?”