Polishing marble tiles is an essential part of maintaining their luster and pristine appearance. Over time, marble can become dull due to foot traffic, spills, and everyday wear. However, with the right techniques and care, you can restore the natural shine of your marble tiles, making them look as grand as the day they were installed.
This guide will take you through the steps required to polish marble tiles effectively, ensuring that they remain a focal point of luxury in your home or business.
Whether you’re dealing with a few square feet in a bathroom or a grand entranceway, the process remains quite similar. Get ready to make your marble surfaces gleam with a mirror-like finish.
Preparation
Materials Needed
- Soft cloths or microfiber towels
- Mild dish soap
- Baking soda (for homemade poultice)
- Marble cleaner (commercially available)
- Marble polish
- Hand-held orbital buffer
- Buffing pads (for orbital buffer)
- Protective gloves
- Safety goggles
- Bucket
- Water
- Measuring cup
- Plastic wrap (for poultice)
- Tape (for sealing plastic wrap)
Remove All Furniture from the Area

Before beginning the polishing process, it’s crucial to clear the area of any furniture and obstacles that may hamper your movement.
This step is not only practical for ensuring a thorough and even polish but also serves as a safety measure to prevent potential damage to your belongings.
By creating an unobstructed workspace, you’ll have full access to each tile, making it easier to achieve consistent results across the entire surface.
Cleaning the Surface
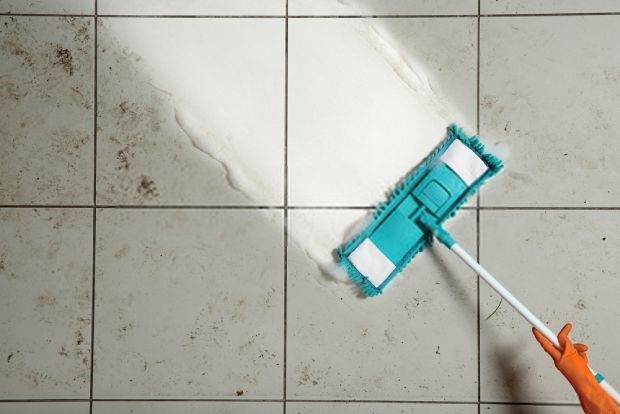
Before initiating the polishing process, it’s imperative to thoroughly clean the marble surface. Start by sweeping or vacuuming the floor to eliminate any loose dirt or debris.
Then, using a soft mop or cloth and a pH-neutral cleaner specifically designed for marble, gently clean the tiles. Avoid acidic or abrasive cleaners that can etch or damage the marble.
After mopping, make sure to rinse the surface with clean water to remove any cleaning residue, and dry the tiles with a soft towel to prevent water spots. A clean surface ensures that when you begin polishing, you’ll be enhancing the stone’s shine rather than buffing dirt into it.
Cleaning the Marble
Mix a Neutral pH Cleaner with Warm Water
Once you have gathered your materials and prepared the marble surface, mix a pH-neutral cleaner with warm water in a bucket, according to the manufacturer’s instructions. The right temperature of water can facilitate the effective breakdown of grease and grime without harming the marble.
It’s important to adhere to the recommended proportions to ensure that the cleaning solution is gentle and does not diminish the marble’s natural luster.
Use this mixture with a soft mop or cloth to clean the surface, as it will be safe for regular use on marble and will not lead to etching or dulling of the finish.
Applying the Cleaning Solution
Once your pH-neutral cleaner is mixed with warm water, it’s time to mop the surface or use a soft cloth to apply the solution. Dip your mop or cloth into the bucket, wring it out slightly to avoid soaking the marble, and then gently clean the tiles in a circular motion.
This method helps in lifting any remaining dirt without saturating the stone, which can be sensitive to excessive moisture. Re-dip the mop or cloth as needed, making sure to rinse it frequently to avoid reapplying dirt onto the marble.
Continue this process until the entire area is covered, ensuring to replace the water if it gets too dirty.
This careful application preserves the integrity of the marble while leaving it pristine and prepared for the next step in the restoration process.
Rinse with Clean Water
After thoroughly cleaning the marble with the pH-neutral solution, it’s crucial to rinse the surface with clean, lukewarm water. This step ensures that no residue of the cleaner is left behind as it can attract dirt and may lead to streaks on the marble.
Use a fresh mop or cloth with clean water to gently go over the area, lifting any cleaner that remains. Be sure to rinse your mop or cloth frequently to maintain the purity of the water.
Dry the Surface Completely
After rinsing, take a clean, soft towel or a microfiber cloth to dry the marble surface entirely. Gently pat the surface or wipe in a circular motion to avoid leaving streaks.
Ensuring that the marble is dry will prevent water spots from forming and will protect it from potential moisture-related damage.
This also allows the marble to shine, displaying its full natural beauty and readiness for everyday use or further treatment if necessary.
Polishing the Marble
Choose the Right Polish for Marble
Selecting the suitable marble polish is critical to maintaining the stone’s luster without damaging its surface. Look for a marble-specific polish with a formula that is designed to enhance the stone’s natural shine without the use of harsh chemicals.
Avoid using general household cleaners or anything acidic, as these can etch the marble and dull its appearance.
Always opt for a product that is pH-neutral and has been tested and approved for use on marble surfaces for best results.
Apply the Marble Polish to the Surface
Once you have selected the appropriate marble polish, apply a small amount onto a soft cloth. Gently rub the polish onto the surface in a circular motion, ensuring you cover the entire area.
It’s important to do this evenly and to work in small sections to avoid missing any spots.
Allow the polish to penetrate the marble for the recommended time as indicated on the label, usually a few minutes, before proceeding to the next step.
Buff the Surface
After the polish has sat for the appropriate amount of time, use a clean, soft cloth to buff the marble surface. Rub the polish into the stone in circular motions with gentle, overlapping strokes.
This process not only works the polish more deeply into the marble but also stimulates a more pronounced shine. Continue buffing until you feel the surface is gleaming and the polish has been fully incorporated.
Allow for Proper Drying Time
Following the buffing process, it’s essential to let the marble dry completely. Adhere to the drying time recommended by the marble polish manufacturer, which is usually included in the instructions on the product label.
This waiting period can vary, but it typically ranges from 10 to 20 minutes. During this drying phase, avoid touching the surface or exposing it to any liquid spills, as premature contact can mar the newly polished finish.
Once the marble has dried, it will reveal a high-gloss shine, showcasing the stone’s restored beauty.
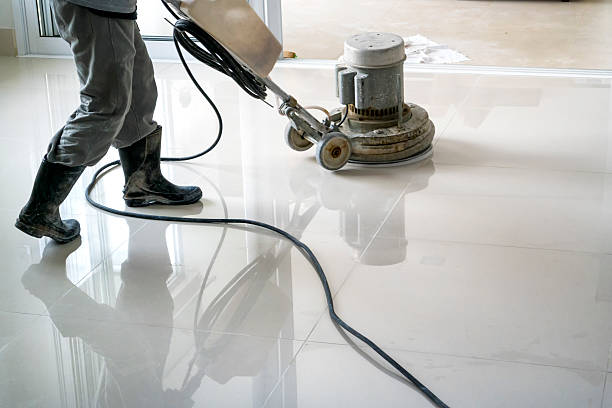
Buffing

For a more professional finish or on larger surfaces, consider using a buffing pad attached to a drill or polisher. This method considerably reduces the effort and time required compared to manual buffing.
The mechanical action ensures a consistent application of polish and an even shine across the entire marble surface.
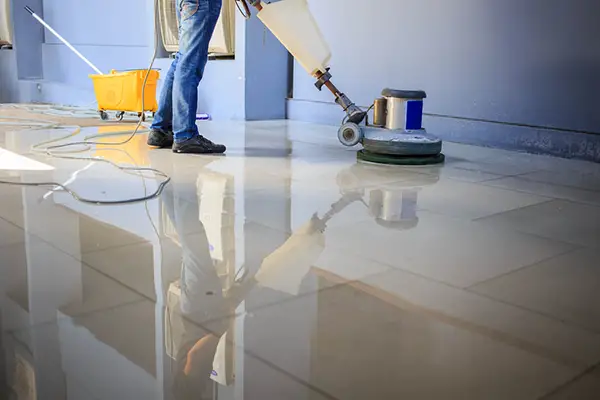
Always begin with a lower speed setting to control the spread of the polish and avoid splatter, then gradually increase the speed as needed to achieve the desired gloss.
When using the buffing pad, it’s important to move it in a circular pattern over the marble. This action helps to distribute the polish uniformly and works it deeper into the stone, contributing to the high shine you are aiming for.
Ensure that you overlap the circles as you work across the surface, maintaining a steady pace and pressure to avoid creating streaks.
Continue this process, methodically covering the entire area, until you attain a gleaming, high-gloss finish that brings out the marble’s natural luster and coloration.
Related Topics:
Finishing Touches
Once the marble has been thoroughly buffed, it’s essential to remove any remaining polish residue that could dull the surface. Begin by lightly dampening a soft cloth with water and gently wipe the marble, taking care not to saturate the stone, as excessive water can penetrate and damage it.
Focus on lifting away leftover polish rather than rubbing hard, which might affect the newly polished surface.
After you’ve successfully removed all traces of polish, grab a clean chamois or microfiber cloth for the final touch. These materials are preferred for their ability to absorb moisture without leaving lint or scratching the delicate marble.
Dry the surface with light, sweeping motions to reveal the deep, reflective shine, making sure to eliminate any streaks or spots.
This step ensures that your marble’s finish is streak-free, showcasing a pristine and luxurious shine that highlights the vivid patterns and colors within the stone.
Maintenance Tips
Regular Cleaning
To preserve the marble’s pristine condition, regularly sweep or dust the surfaces. This routine maintenance prevents the accumulation of debris that can scratch the marble and diminish its shine over time.
Ensuring that the stone remains free from dust and grit maintains its smoothness and radiance.
Spill Management
In the event of spills, it is crucial to clean them immediately. Marble is particularly susceptible to staining because of its porous nature. Quick attention to spills with a gentle cleaner will prevent liquids from penetrating the surface and causing discoloration.
Strategic Protection
Place rug pads or floor mats in high-traffic areas to protect marble flooring. These barriers act as a first line of defense against dirt, grit, and potential abrasions carried in by foot traffic, significantly reducing wear and tear on the marble’s surface.
Conclusion
Polishing marble tiles is a delicate process that rejuvenates their natural elegance and contributes to the longevity of their luxurious appearance.
By adhering to the steps we’ve outlined using the right materials, cleaning meticulously, applying and buffing the appropriate polish you can maintain and enhance the shine of your marble tiles, keeping them as radiant as they were on the first day.
Remember, the beauty of marble lies in its lustrous finish and intricate patterns, which are preserved through careful and consistent care. The final deep, reflective shine achieved after a proper polish not only speaks volumes about your commitment to maintaining high standards but also solidifies marble’s status as a statement piece in any setting.
Whether in a residential or commercial space, the polished marble that gleams with a mirror-like finish is a testament to timeless elegance and craftsmanship.
FAQs
How often should marble floors be polished to maintain their shine?
Marble floors typically need to be polished every one to three years, depending on the level of foot traffic and exposure to wear and tear. Regular cleaning and immediate spill cleanup will help maintain the shine longer, but professional re-polishing is recommended to restore the marble’s natural luster periodically.
Can I use vinegar or citrus-based cleaners on marble?
No, you should avoid using vinegar, citrus-based cleaners, or any acidic substances on marble, as they can etch the surface and cause dulling or damage. Always use a pH-balanced cleaner specifically designed for natural stone.
What should I do if my marble flooring gets a scratch?
For minor scratches, you can use a marble polishing powder and follow the manufacturer’s instructions to attempt buffing it out. Deeper scratches may require professional services where they can either re-polish the entire area or perform spot treatments depending on the severity of the scratch.
1 thought on “Step-by-Step Instructions for Polishing Marble Tiles”