Painting mosaic tiles allows you to breathe new life into your decor with a unique and creative flair. Whether you’re updating a backsplash, revitalizing a patio table, or adding a vibrant touch to a piece of furniture, the process of painting mosaic tiles can transform an ordinary space into a visual masterpiece.
In this guide, we will walk you through the steps of how to paint mosaic tiles effectively, ensuring a stunning result that captures your style.
Mosaic tile painting is gaining popularity due to its versatility and the creative possibilities it offers. It’s a cost-effective way to revamp interior or exterior spaces, allowing you to customize and inject your aesthetic into your surroundings.
This technique is not only applicable to home improvements but also extends to public art installations, enhancing the beauty and cultural values of urban spaces.
Furthermore, painting mosaic tiles is a therapeutic activity that promotes relaxation and stress relief, making it an enjoyable hobby for many.
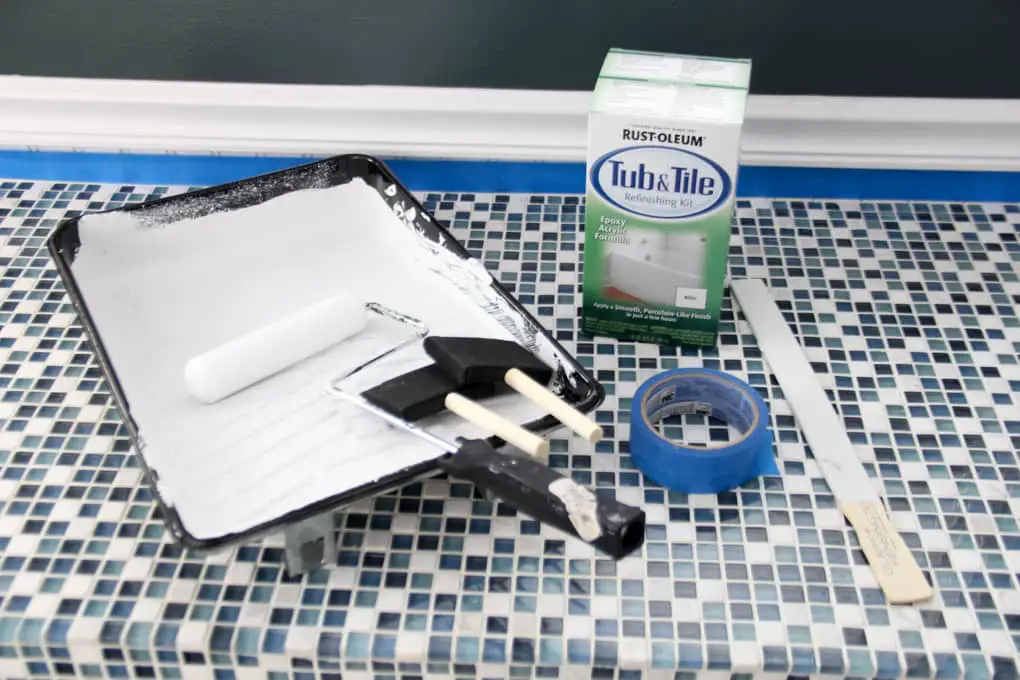
Materials Required
- Mosaic Tiles
- Acrylic Paints: Ensure you have a variety of colors to achieve the desired effect.
- Paintbrushes: A set of brushes of different sizes, including fine-tipped brushes for detailing.
- Palette: For mixing paints.
- Sealant: To protect the painted tiles from damage and wear.
- Cleaning Cloth: To clean the tiles before painting.
- Water Container: To wash brushes between colors.
- Drop cloth or Newspaper: To protect your working area from potential spills.
- Gloves: To keep your hands clean during the painting process.
- Respirator Mask: If you are working in an area with poor ventilation, a mask can protect against inhalation of paint fumes.
- Safety Glasses: To protect your eyes.
- Mosaic Tile Adhesive and Grout: If you’re starting a mosaic project from scratch.
Preparation
Cleaning and Preparing the Mosaic Tiles
Before you start painting, it’s crucial to ensure your mosaic tiles are clean and free of any dust or grime that might interfere with paint adhesion. Here are the steps you need to follow:
Clean Your Tiles:
Start by placing your tiles on a clean, flat surface. Use a cleaning cloth to wipe each tile. If there’s stubborn dirt, a slightly damp cloth can be used. Be sure to dry the tiles completely before proceeding to the next step.
Inspect the Tiles:
Look for any chips or cracks on the surface of the tiles. If any are found, it’s best to replace these tiles or avoid painting them as the damaged areas may affect the overall result.
Arrange Your Tiles:
Depending on your design, you might want to lay out your tiles in the pattern you plan to paint. This step helps to visualize the final result and make any necessary adjustments before you start painting.
Prepare Your Workspace:
Cover your workspace with a drop cloth or newspaper to protect it from any potential spills. Now that your tiles are prepared, you’re ready to start painting your mosaic masterpiece.
Setting Up the Workspace
Creating an ideal workspace is essential to efficiently paint your mosaic tiles. Here are a few steps to set up your workspace:
Choose an Area:
Find a spacious and well-lit area that can be dedicated to your painting project. It should be well-ventilated to ensure the fumes from the paint do not build up.
Organize Your Supplies:
Layout your paints, brushes, palette, water container, rag, and tiles within easy reach. This setup ensures you can access all your materials without needing to stretch or move too much, keeping your focus solely on the painting process.
Protect Your Space:
Cover the floor and workspace surface with a drop cloth or newspaper. This step not only keeps the spaces clean but also makes cleaning up after painting quicker and easier.
Prepare Your Paints:
Squeeze out the required paint colors onto your palette. Having the paint ready before you start will help you maintain a steady workflow.
Safety Measures:
Keep your gloves, safety glasses, and respirator mask close to your hand. Remember, safety is paramount when working with materials like paint and grout.
Designing
Planning and Sketching the Design on the Tiles
The first step in painting mosaic tiles is planning and sketching your design. Start by determining what design you want to paint. This could be anything from geometric patterns to a scenic landscape – the only limit is your imagination.
Once you’ve settled on a design, sketch it onto your tiles using a soft sketching pencil. Be sure to use light strokes as you’ll be painting over these lines. If you make a mistake, simply erase it and continue.
This planning and sketching stage is crucial as it serves as your guide during the painting process.
Tips for Choosing Colors and Patterns
Choosing the right colors and patterns can make or break your mosaic tile painting. As a general rule, use three to five colors to keep the design cohesive and not too overwhelming.
When selecting colors, consider the room where the tiles will be used. You may want to choose colors that complement the room’s overall color scheme. As for patterns, consider the size of your tiles.
Larger tiles can accommodate more intricate patterns, while smaller tiles might look better with simpler designs. Experiment with different color combinations and patterns until you find a design that suits your style and the room’s aesthetic.
Painting
Step 1: Prepare Your Workspace
Before you start painting, it’s important to prepare your workspace. This includes putting down a drop cloth to protect your work surface, gathering all your supplies, and ensuring you have good lighting. Also, keep a cup of water and a rag nearby for cleaning your brushes.
Step 2: Apply Primer
Primer is essential as it ensures the paint adheres well to the tile surface. Use a paintbrush to apply a coat of primer to each tile, ensuring you cover the whole surface. Let it dry thoroughly before moving on to the next step.
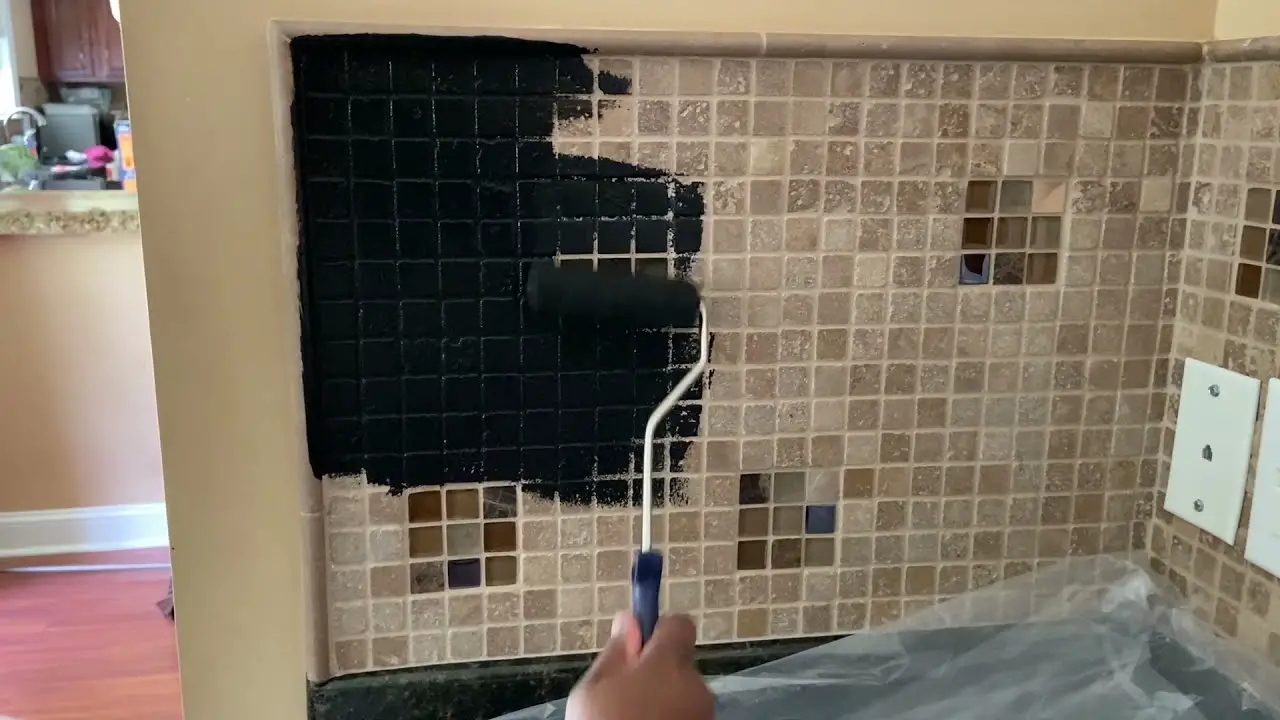
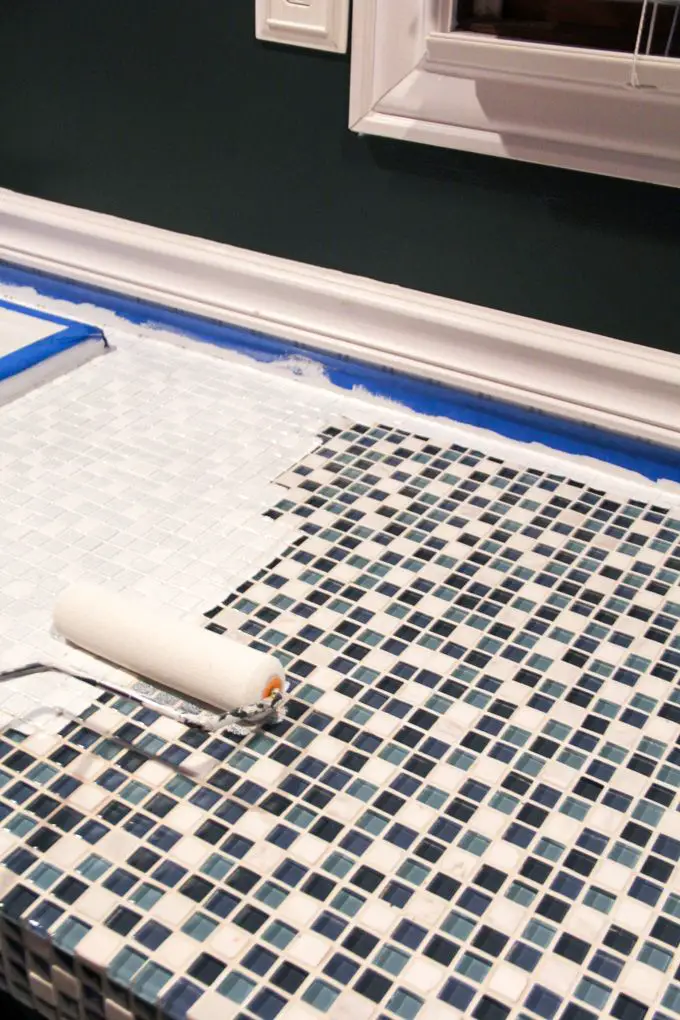
Step 3: Start Painting Your Design
Using the sketch as your guide, begin painting your design onto the tiles. You can use different brushes for different effects. For example, a thin brush is perfect for detailed work, while a thicker brush can fill larger areas more quickly. Be patient and take your time to get the details right.
Step 4: Apply a Second Coat if Necessary
Depending on the colors you’ve chosen, you may need to apply a second coat of paint. This will ensure your colors are vibrant and the coverage is even. Allow the first coat to dry completely before applying the second one.
Step 5: Clean Up
Finally, clean up your workspace. Rinse out your brushes, close your paint pots, and dispose of your drop cloth. Take care to dispose of any paint or primer by local regulations.
Techniques for Achieving Different Effects
Creating a mosaic look with paint involves not just the basic steps, but also the mastering of certain painting techniques. Here are a few methods you can try:
1. Sponge Painting: This method is perfect for creating a textured, grout-like effect. Simply dip a sponge in paint and dab it onto the tiles. You can use a single color or layer multiple colors for a more complex look.
2. Dry Brushing: Dry brushing involves using a brush with very little paint and brushing it onto the tiles. This technique creates a worn, rustic effect, giving your tiles a unique, aged appearance.
3. Stippling: Stippling is a painting technique in which small dots of paint are applied to the surface. This technique creates a textured, speckled effect that can add depth and dimension to your tiles.
4. Gradients: Gradients involve transitioning from one color to another. Start with a dark color at one end of your tile and gradually blend in a lighter color as you move to the other end. This technique can add a sense of movement and depth to your design.
Remember, the key is to experiment with different techniques and colors until you achieve the desired effect. These methods will give your painted mosaic tiles a unique and personalized touch.
Related Topics:
Drying and Sealing
Properly drying the painted tiles
Once you have finished painting your mosaic tiles, it is crucial to allow them sufficient time to dry properly. This process cannot be hurried.
Typically, paint on tiles takes about 24 hours to fully dry, but this may vary depending on the type of paint used and room temperature.
Make sure to let your tiles dry in a well-ventilated area, but keep them out of direct sunlight to prevent the paint from drying too fast and cracking.
To check if your tiles are fully dry, gently touch the surface with your fingertip. If no paint comes off and the surface doesn’t feel tacky, your tiles are likely to dry.
However, always remember to handle your painted tiles with clean hands to avoid leaving any oil or dirt that may affect the paint’s adhesion.
Applying a Sealant for Protection and Longevity
After ensuring your painted mosaic tiles are completely dry, the final step is to apply a sealant. This is essential for protecting the artwork from wear and tear and ensuring its longevity.
Use a clear, water-based urethane sealer designed for use on painted surfaces. With a clean, soft brush, apply a thin, even coat of the sealant to each tile. Be sure to cover the entire painted surface and edges, but avoid applying too much sealant at once as it can cause streaks.
Allow the first coat of sealant to dry thoroughly this usually takes around 24 hours. Once dry, assess the surface.
If it appears evenly coated and shiny, one coat may be sufficient. However, for added protection and a more polished look, a second coat can be applied. Remember to let each coat dry fully before applying the next.
By following these steps, your painted mosaic tiles will have a beautiful, durable finish that can withstand the test of time. Always consult the manufacturer’s instructions on the sealant packaging for optimal results.
Conclusion
In conclusion, painting mosaic tiles is a creative, cost-effective way of transforming your surroundings and personalizing your decor. This guide has walked you through the necessary steps, from preparation and design to painting, drying, and sealing, ensuring a stunning and durable result.
This enriching activity is not only a method of enhancing interior or exterior spaces, but it also serves as a therapeutic craft, providing relaxation and an outlet for creative expression.
By following these instructions on how to paint mosaic tiles, you can create unique art pieces that not only echo your style but also stand the test of time.
FAQs
What type of paint is best for painting mosaic tiles?
Acrylic paint is generally the best choice for painting mosaic tiles. It is versatile, durable, and comes in a wide range of vibrant colors. Additionally, acrylic paint is water-based, making it easy to clean up and safe for the environment.
Can I use any sealant on my painted mosaic tiles?
It’s advisable to use a clear, water-based urethane sealer designed for use on painted surfaces. This type of sealant will provide a protective layer, ensuring the longevity of your painted mosaic tiles.
How long does it take for the paint to dry on mosaic tiles?
The drying time can vary depending on the type of paint and environmental conditions, but generally, acrylic paint on mosaic tiles should be allowed to dry for around 24 hours before applying a sealant. Always follow the manufacturer’s instructions for best results.